Benvenuti zu La Dolce Winta – der Saison, in der Wintergrau keine Chance hat und alles nach Glanz, Glitzer und ein bisschen Amore ruft. Mit unserem Alu-Bastel-ABC findest du dein kreatives Ciao Bello: La bella robusta (Alu-Bastelkarton) für alles, was Form braucht, la morbida (Alufolie) für smoothes Funkeln, und la struttura (Prägefolie) für glänzende Details. Unsere Mini-DIYs sind schnell gemacht, sofort wow und voll Dolce Winta-Feeling – von shiny Haarclips bis zur kleinen Sardinen-Liebesdose. Also: Alu schnappen, Kreativität anknipsen und laut sagen: Alu more mio! / Benvenuti to La Dolce Winta – the season where winter gray has no chance and everything calls for sparkle, glitter, and a little amore. With our Alu-Crafting ABC, you’ll find your creative Ciao Bello: La bella robusta (DIY alu-hobby card) for anything that needs shape, la morbida (aluminum foil) for smooth sparkle, and la struttura (DIY aluminium embossing foil) for shiny details. Our mini-DIYs are quick to make, instantly wow, and full of Dolce Winta feeling – from shiny hair clips to the tiny sardine love tin. So: grab your aluminium foil, switch on your creativity, and say it loud: Alu more mio!
Vorlagen zum Ausdrucken / Printable templates
Anleitungen / Instructions
Glitzer, Glanz & DIY-Amore / Glitter, Shine & DIY Amore
Mit unserem Booklet bekommst du noch mehr schnelle, einfache und freche Ideen für deine La Dolce Winta-Kreationen – direkt zum Mitbasteln! / With our booklet, you’ll get even more quick, easy, and cheeky ideas for your La Dolce Winta creations – ready for you to start crafting!
Alu DIYs Booklet / Aluminum DIY Booklet
Schicker Lampenschirm / Chic Lampshade

Was du brauchst / what you need:
- Vorlage / printable template
- folia Alu-Bastelkarton / DIY alu-hobby card
- Tischlampe mit Lampenschirmrohling / Table lamp with lampshade base
- LED-Glühbirne (E27) / LED bulb (E27)
- folia Bastelschere / scissors
- folia Doppelseitiges Klebeband / double-sided sticky tape
- Heißkleber / hot glue gun
- Bleistift / pencil
So wird gebastelt / That’s how it’s done:
- Schneide die Vorlage aus und übertrage sie jeweils 4x zwei verschiedene Farben des Alu-Bastelkartons, z.B. blau und rosa. / Cut out the template and transfer it four times each onto two different colors of DIY alu-hobby card, e.g., blue and pink.
- Klebe die Rechtecke an der Kante mit doppelseitigem Klebeband vorsichtig zu einem Lampenschirm zusammen. / Carefully glue the rectangles along the edges with double-sided tape to assemble the lampshade.
- Setze ihn auf den Lampenschirmrohling und klebe ihn mit Heißkleber fest. / Place it on the lampshade base and secure it with hot glue.
- Stelle sicher, dass du eine LED-Glühbirne (E27) verwendest, um Hitzebildung zu vermeiden. / Make sure to use an LED bulb (E27) to avoid heat buildup.
- Tipp: Passe die Vorlage an deine Lampe an: Kürze oder verlängere sie nach Belieben bzw. nach den Maßen deiner Lampe! / Tip: Adjust the template to fit your lamp: shorten or lengthen it as you like or according to your lamp’s measurements!
Schleifen-Ohrringe / Bow Earrings
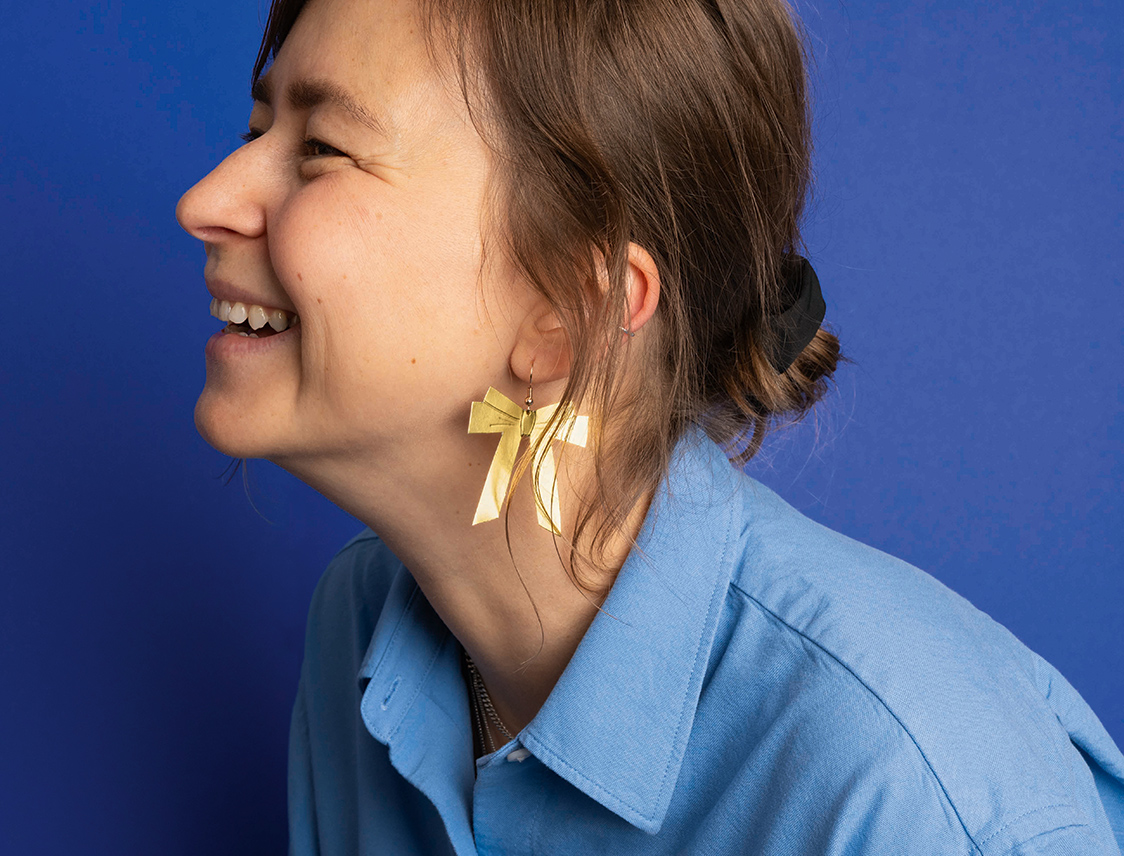
Was du brauchst / what you need:
- Vorlage / printable template
- Ohrring-Haken / Earring hooks
- folia Alu-Bastelkarton / DIY alu-hobby card
- folia Bastelschere / scissors
- folia Klebestift / glue stick
- folia Präge- & Prickelstifte / Embossing & pricking pens
- Heißkleber / hot glue gun
- Bleistift / pencil
So wird gebastelt / That’s how it’s done:
- Lege die Vorlage auf den Alu-Bastelkarton und fahre sie mit dem Prägestift nach. / Place the template on the DIY alu-hobby card and trace it with the embossing pen
- Schneide die Schleife aus dem Alu-Bastelkarton aus und steche ein Loch in die Mitte. / Cut the bow out of the DIY alu-hobby card and pierce a hole in the center.
- Befestige den Ohrring-Haken daran. Che chic! / Attach the earring hook. Che chic!
Servietten-Schrimp / Napkin Shrimp
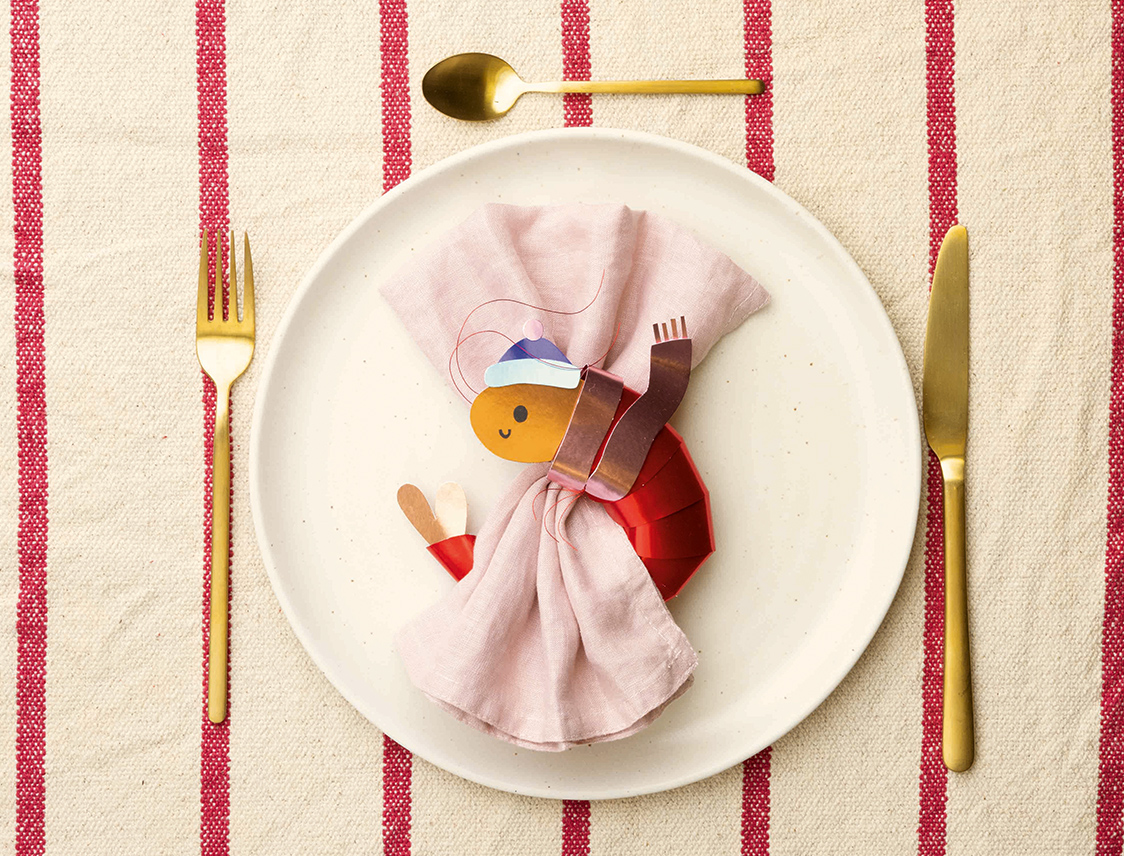
Was du brauchst / what you need:
- Vorlage / printable template
- folia Alu-Bastelkarton / DIY alu-hobby card
- folia Basteldraht rot (Artikelnr. 79909) / craft wire red
- folia Tonpapier / tinted paper
- folia Bastelschere / scissors
- folia Doppelseitiges Klebeband oder Heißkleber / double-sided sticky tape or hot glue gun
- Bleistift / pencil
So wird gebastelt / That’s how it’s done:
- Schneide die Vorlage aus und übertrage sie auf die verschiedenen Alu-Bastelkarton-Farben. / Cut out the template and transfer it onto the different DIY alu-hobby card colours.
- Schneide alle Teile vorsichtig aus. / Carefully cut out all the pieces.
- Knicke den Körper des Schrimp an der gestrichelten Linie. / Fold the body of the shrimp along the dotted line.
- Klebe alle Teile mit doppelseitigem Klebeband oder Heißkleber zusammen. / Glue all the pieces together with double-sided tape or hot glue.
- Schneide 2x roten Basteldraht für die Fühler und 3x für die Beinchen zurecht. Klebe ihn an die Rückseite des Kopfes nd des Körpers. / Cut two pieces of red craft wire for the antennae and three pieces for the legs. Attach them to the back of the head and body.
- Noch eine Serviette hineingesteckt und fertig ist dein Servietten-Schrimp! / Stick a napkin in, and your napkin shrimp is ready!
Kragen mit Volants / Ruffled Collar with Flounces
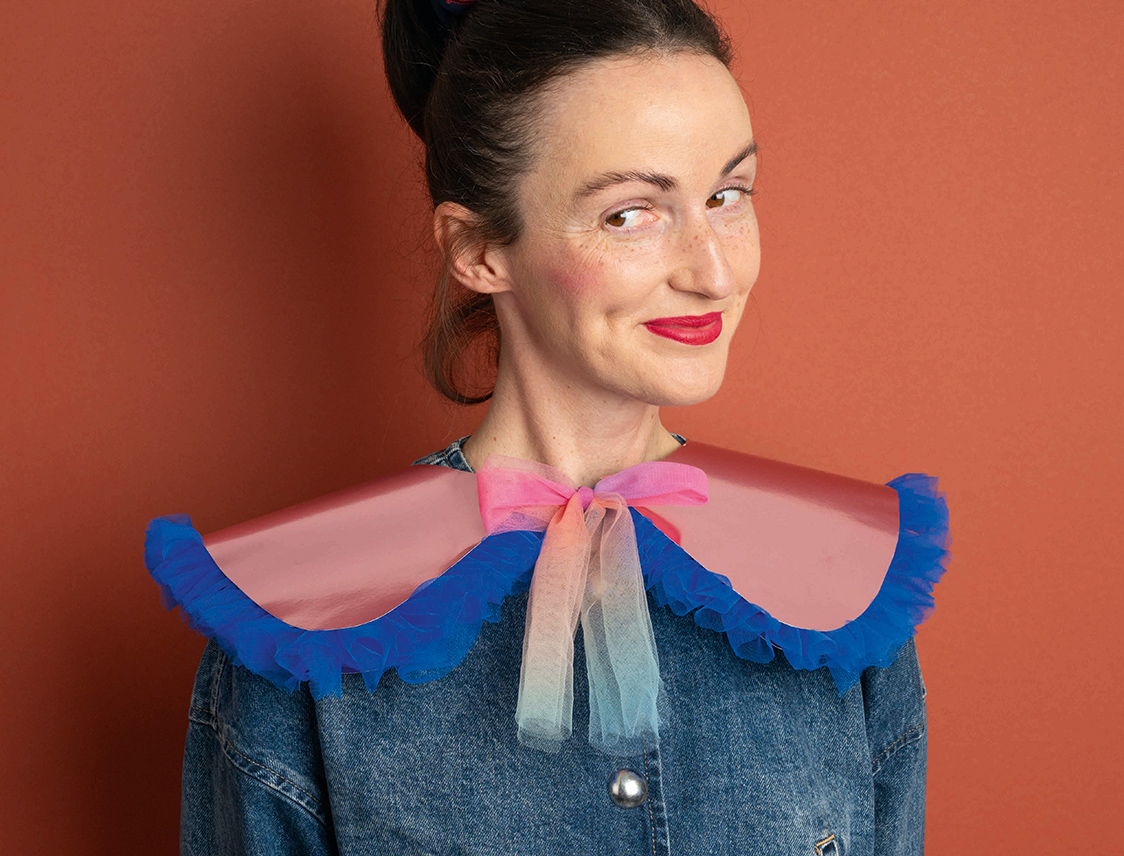
Was du brauchst / what you need:
- Vorlage / printable template
- folia Alu-Bastelkarton / DIY alu-hobby card
- folia Tüll blau (Artikelnr. 8036) und Tüll Regenbogen (Artikelnr. 8077) / blue tulle (article no. 8036) and rainbow tulle (article no. 8077)
- folia Bastelschere / scissors
- folia Doppelseitiges Klebeband oder Heißkleber / double-sided sticky tape or hot glue gun
- Bleistift / pencil
- Tacker / stapler
So wird gebastelt / That’s how it’s done:
-
Schneide die Vorlage aus und klebe sie zusammen. Übertrage sie auf den Alu-Bastelkarton und schneide beide Teile aus. / Cut out the template and glue it together. Transfer it twice onto the DIY alu-hobby card and cut out both pieces.
-
Schneide den blauen Tüllstoff 5 cm breit zu. / Cut the blue tulle fabric to a width of 5 cm.
-
Klebe ihn mit doppelseitigem Klebeband auf einen der beiden Kragen. Klebe ihn 2 cm breit auf dem Kragen fest und lasse ihn 3 cm herausschauen. / Attach it to one of the two collars using double-sided tape. Stick 2 cm of it onto the collar and let 3 cm peek out.
-
Klebe das zweite Teil des Kragens auf das erste Teil. / Glue the second collar piece onto the first one.
-
Schneide zwei Streifen des Tüllstoffs Regenbogen zu tackere sie an den Kragen. Binde eine Schleife. / Cut two strips of rainbow tulle and staple them to the collar. Tie a bow.
Shiny Haar-Clips / Shiny Hair Clips
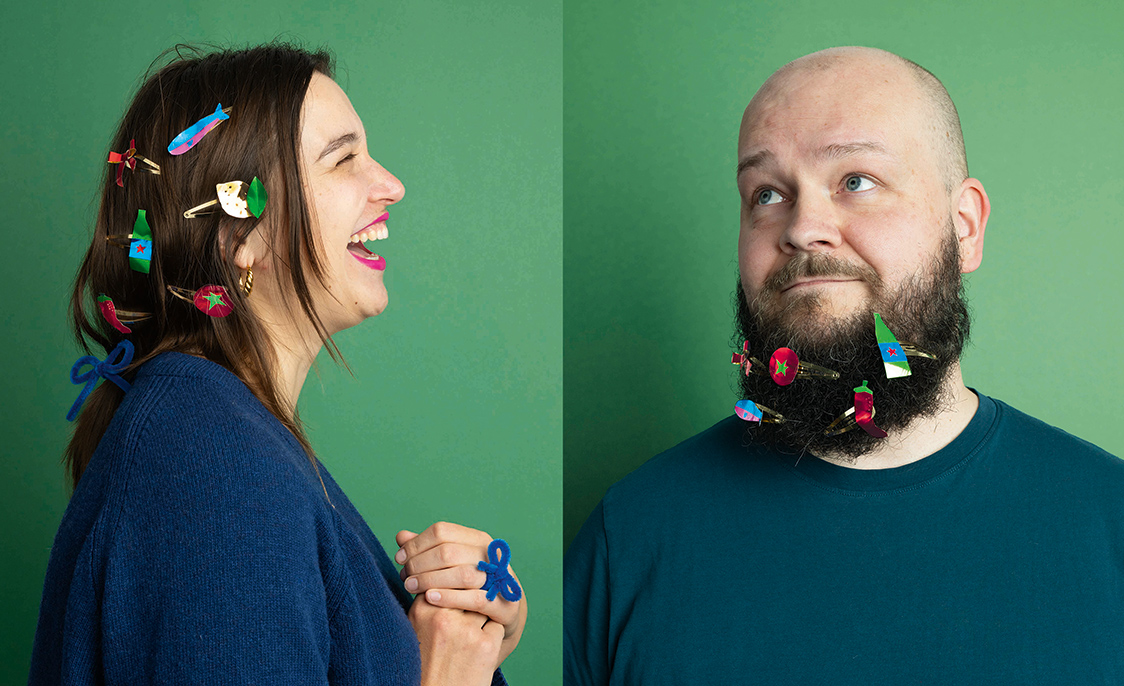
Was du brauchst / what you need:
- Vorlage / printable template
- Haar-Clips
- folia Aluminiumfolie / aluminium foil
- folia Bastelschere / scissors
- folia Klebestift / glue stick
- Heißkleber / hot glue gun
- Bleistift / pencil
So wird gebastelt / That’s how it’s done:
- Schneide die Vorlage aus, übertrage die Motive auf die Alufolie und schneide alle Teile aus. / Cut out the template, transfer the motifs onto the aluminum foil, and cut out all the pieces.
- Klebe die Teile mit Klebestift zusammen, z.B. das Blatt auf die Zitrone. / Glue the pieces together with a glue stick, e.g., the leaf onto the lemon.
- Klebe die fertigen Motive vorsichtig mit Heißkleber auf die Haar-Clips. / Carefully attach the finished motifs to the hair clips using hot glue.
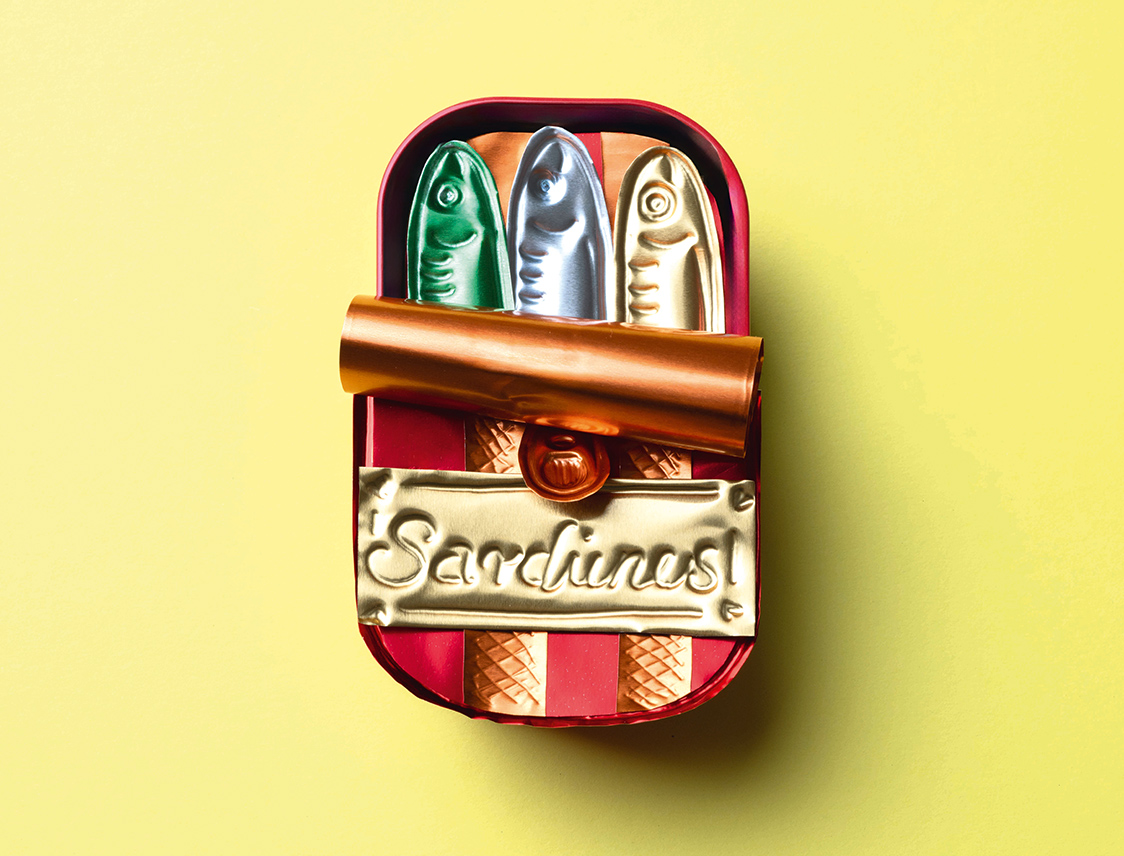
Freche Sardinendose / Cheeky Sardine Tin
Was du brauchst / what you need:
- Vorlage / printable template
- folia DIY Alu Prägefolie / DIY aluminium embossing foil
- Sauberes Unterteil einer Sardinendose (6 x 10,5 x 3 cm) / Clean bottom part of a sardine tin (6 x 10.5 x 3 cm)
- Karton / cardboard
- folia Bastelschere / scissors
- folia Präge- & Prickelstifte / Embossing & pricking pens
- folia Doppelseitiges Klebeband oder Heißkleber / double-sided sticky tape or hot glue gun
- folia 3D-Klebepads / 3D adhesive pads
- runder Bleistift / round pencil
So wird gebastelt / That’s how it’s done:
- Lege die Vorlage auf die Alu Prägefolie und übertrage/präge die Motive auf die Prägefolie. / Place the template on the DIY aluminum embossing foil and transfer/emboss the motifs onto the embossing foil.
- Schneide alle Teile aus. / Cut out all the pieces.
- Klebe die beiden Streifen (A und B) auf den inneren Untergrund (C) mit doppelseitigem Klebeband. / Attach the two strips (A and B) to the inner base (C) using double-sided tape.
- Klebe die drei Fische (D) mit 3D-Klebepads auf für einen coolen 3D-Effekt. / Stick the three fish (D) on using 3D adhesive pads for a cool 3D effect.
- Klebe die beiden Streifen (E und F) auf den Deckel (G). / Attach the two strips (E and F) to the lid (G).
- Klebe das „Sardines“-Schildchen (H) darauf. / Glue the “Sardines” label (H) on top.
- Klebe die Ringlasche (I) auf. / Glue on the ring-pull tab (I).
- Rolle das Rechteck (J) mithilfe eines runden Stifts vorsichtig ein. Klebe es an die Oberseite des Deckels, sodass die Kante des Deckels und die Kante der Ringlasche verdeckt werden. / Carefully roll the rectangle (J) using a round pen. Glue it to the top of the lid so that the edge of the lid and the edge of the ring-pull tab are covered.
- Schneide ein Stück Karton zurecht (Höhe ca. 1,5 cm) und klebe ihn in die Sardinendose. Du kannst mehrere Kartonstücke übereinanderkleben, damit du die Höhe 1,5 cm erreichst. / Cut a piece of cardboard (about 1.5 cm high) and glue it inside the sardine tin. You can glue several pieces of cardboard on top of each other to reach the 1.5 cm height.
- Klebe den Untergrund mit den Sardinen auf den Karton/auf die Sardinendose. / Glue the base with the sardines onto the cardboard/onto the sardine tin.
- Klebe noch den Deckel auf. Buon appetito! / Glue on the lid. Buon appetito!
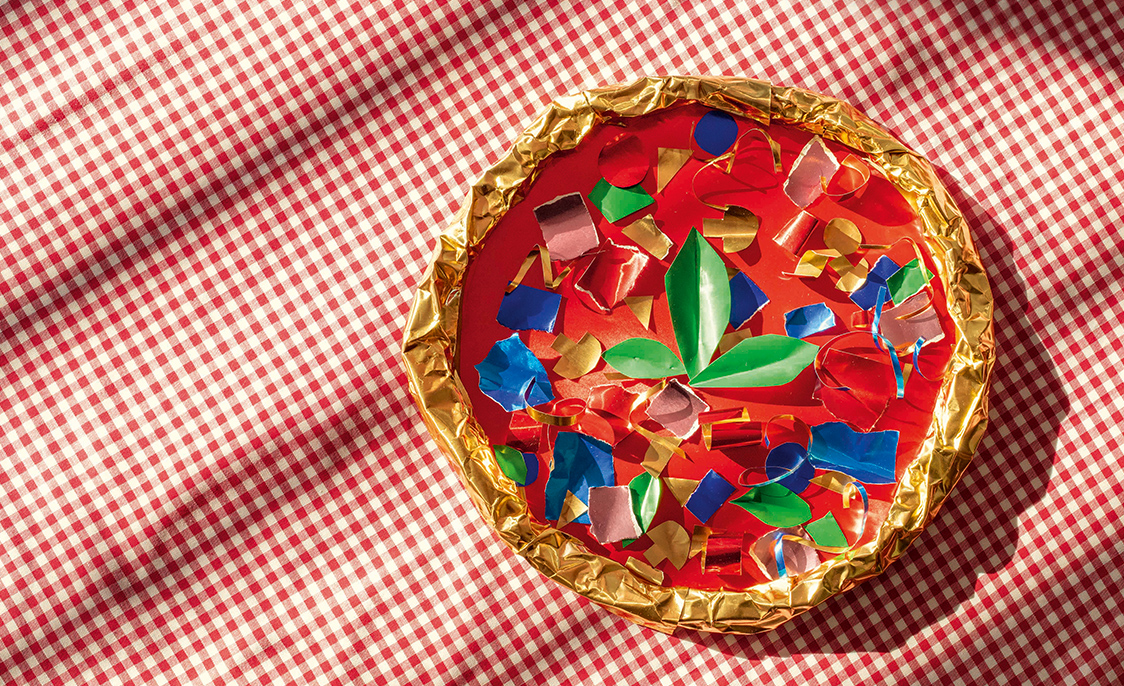
Funkelnde Reste-Pizza / Sparkling Leftover Pizza
Was du brauchst / what you need:
- Vorlage / printable template
- Reste von folia Alufolie, Prägefolie und Alu-Bastelkarton / Scraps of folia aluminum foil, aluminium embossing foil, and DIY alu-hobby card
- folia Bastelschere / scissors
- folia Doppelseitiges Klebeband oder Heißkleber / double-sided sticky tape or hot glue gun
- Bleistift / pencil
So wird gebastelt / That’s how it’s done:
- Schneide die Vorlage aus und klebe beide Teile der Pizza zusammen. / Cut out the template and glue both parts of the pizza together.
- Übertrage die Pizza-Vorlage auf das Material deiner Wahl, z.B. roten Alu-Bastelkarton, und schneide sie aus. / Transfer the pizza template onto the material of your choice, e.g. red DIY alu-hobby card, and cut it out.
- Schneide Toppings aus verschiedenen Materialien aus wie Salami, Käse, Pilze, Basilikum und alles, was dir sonst noch einfällt! Du kannst auch Alu-Reste in eine Form reißen. / Cut out toppings from different materials, such as salami, cheese, mushrooms, basil, and anything else you can think of! You can also tear aluminum scraps into shapes.
- Zerknülle goldene Alufolie und klebe sie auf den Rand des Kreises. / Crumple golden aluminum foil and glue it along the edge of the circle.
- Klebe die Toppings auf deine Pizza. Buon appetito! / Glue the toppings onto your pizza. Buon appetito!

Noch mehr Ideen findest du in unserem Booklet. Werde kreativ und hol dir die La Dolce Winta zu dir nach Hause! / Find even more ideas in our booklet. Get creative and bring La Dolce Winta into your home!
Tina und Lisa sind die Chefinnen des Glanzes: Mit Witz, Kreativität und einer Extra-Portion Alu-Amore hauchen sie jedem DIY ein freches, funkelndes „Ti amo“ ein. / Tina and Lisa are the queens of sparkle: with wit, creativity, and an extra dose of aluminum amore, they give every DIY a cheeky, glittering ‚Ti amo’.
Zeige uns deine shiny Alu-DIYs auf Instagram und tagge uns mit #foliadiy und @folia_diy! / Show us your shiny aluminum DIYs on Instagram and tag us with #foliadiy and @folia_diy!


